1 Introduction
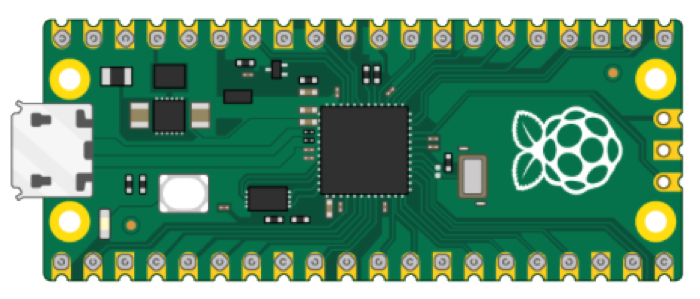
In this Tutorial we will use Raspberry Pi Pico and a TMP36 Temperature Sensor. Raspberry Pi Pico is a microcontroller board developed by the Raspberry Pi Foundation. Raspberry Pi Pico has similar features as Arduino devices. Raspberry Pi Pico is typically used for Electronics projects, IoT Applications, etc.
Raspberry Pi Pico and TMP36 Temperature Sensor (YouTube) + PowerPoint (PDF)
What do you need?
- Raspberry Pi Pico
- A Micro-USB cable
- A PC with Thonny Python Editor (or another Python Editor)
- Breadboard
- Electronics Components like LED, Resistors, Jumper wires, etc.
- TMP36 Temperature Sensor
The TMP36 Temperature Sensor is a small and cheap temperature sensor that you can buy everywhere, like Adafruit, Sparkfun, Elfa Distrelec, etc.
1.1 Raspberry Pi Pico
Raspberry Pi Pico is a “downscaled” version of the original Raspberry Pi and is more comparable with Arduino compared to the original Raspberry Pi. You also need to use a downscaled version of Python, called MicroPython.
Haven't used Raspberry Pi Pico before? Getting Started with Raspberry Pi Pico
1.2 Thonny Python Editor
Thonny is a simple and user-friendly Python Editor and it is cross-platform working on Windows, macOS and Linux. And its free.
Webpage: https://thonny.org
1.3 MicroPython
As mentioned, Raspberry Pi Pico uses a downscaled version of Python, called MicroPython, but most of the original Python will work.
Here you will find more Python Resources.
1.4 Getting Started
The first time you need to install the MicroPython Firmware on your Raspberry Pi Pico. You can install the MicroPython Firmware manually or you can use the Thonny Editor.
2 TMP36 Temperature Sensor
TMP36 provides a voltage output that is linearly proportional to the temperature in degrees Celsius. It has an accuracy of ±1°C at +25°C and ±2°C in the −40°C to +125°C temperature range. For more details, see the TMP36 Datasheet.
Here you see the relationship betwwen volatge and the temperature in degrees Celsius:
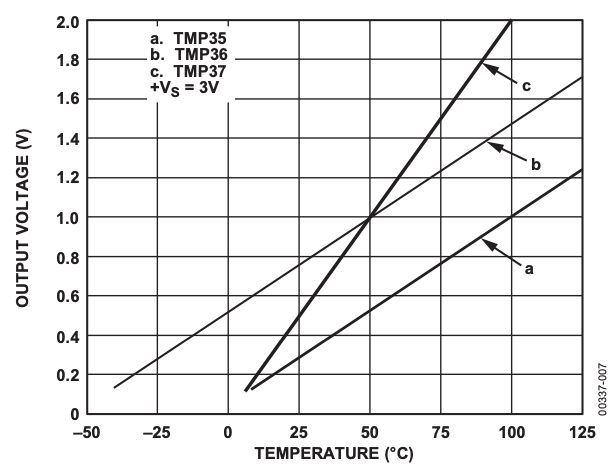
The figure above is from the TMP36 Datasheet.
3 TMP36 in MicroPython
Here we will use a TMP36 Temperature Sensor that we wire on a Breadboard and connects to the Raspberry Pi Poco board.
Here you see the wiring diagram:

Basic Code Example
Lets start with a basic code example using MicroPython.
Raspberry Pi Pico - TMP36 (Basic Example)
Code Structure:
In order to read thetemperature we beed to do the following steps:
- Initialization.
- Read from ADC (Analog to Digital Converter) using
read_u16()function. - Convert raw ADC Value (0-65535) to Voltage Value (0-3.3v). The built-in ADC has 16 resolution.
- Convert from Voltage Value to Temperature in degrees Celsius. Use information from the TMP36 Temperature Sensor Datasheet.
Here you see a bit more detailed steps in the code structure:
1. Initialization
adcpin = 26
tmp36 = ADC(adcpin)
2. Read from ADC:
adc_value = tmp36.read_u16()
3. Convert raw ADC Value (0-65535) to Voltage Value (0-3.3v):
volt = (3.3/65535)*adc_value
4. Convert from Voltage Value to Temperature in degrees Celsius:
degC = (100*volt) - 50
Then we end up with the following casic TMP36 Example using MicroPython:
from machine import ADC
from time import sleep

adcpin = 26
tmp36 = ADC(adcpin)

while True:
    adc_value = tmp36.read_u16()
    volt = (3.3/65535)*adc_value
    degC = (100*volt)-50
    print(round(degC, 1))
    sleep(5)
Raspberry Pi Pico has 3 Analog Input pins that we can use. Here you see the Raspberry Pi Pico Pinout.
ADC Value to Voltage Value:
The built-in Analog-to-Digital Converter (ADC) on Raspberry Pi Pico has a 16 bit resolution (2^16 = 65536 different levels), producing values from 0 to 65535. The read_u16() function gives a value between 0 and 65535. It must be converted to a Voltage Signal 0 - 3.3v.
Convert from Voltage (V) to degrees Celsius:
From the TMP36 Datasheet we have that:
(x1, y1) = (0.75V, 25°C)
(x2, y2) = (1V, 50°C)
There is a linear relationship between Voltage and degrees Celsius:
y = ax + b
We can find a and b using the following known formula:
y − y1 = [(y2 − y1)/(x2 − x1)] * (x−x1)
This gives the following equation: y = 100x - 50
You can also improve the code quality by putting the conversion part into a separate function, etc.:
from machine import ADC
from time import sleep

adcpin = 26
tmp36 = ADC(adcpin)

def ReadTemperature():
    adc_value = tmp36.read_u16()
    volt = (3.3/65535)*adc_value
    degC = (100*volt)-50
    return degC

while True:
    degC = ReadTemperature()
    print(round(degC, 1))
    sleep(5)
More information/resources regarding Functions in Python:
Create Functions with Python (YouTube) + PowerPoint (PDF)
4 Final Application
In the final example the code has been put into a separate Class and a separate Python Module:
Python Module (Filename: TemperatureSensors.py):
from machine import ADC

class Tmp36Sensor:
    def __init__(self, pin):
        self.tmp36 = ADC(pin)

    def ReadTemperature(self):
        adc_value = self.tmp36.read_u16()
        volt = (3.3/65535)*adc_value
        degC = (100*volt)-50
        return round(degC, 1)
Main Program:
from TemperatureSensors import Tmp36Sensor
from time import sleep

adcpin = 26
tmp36 = Tmp36Sensor(adcpin)

while True:
    degC = tmp36.ReadTemperature()
    print(degC)
    sleep(5)
More information/resources regarding Classes and Modules in Python:
Create Classes in Python (YouTube) + PowerPoint (PDF)
Final Results:
Here you see the final results in the Thonny Python Editor:


For more Raspberry Pi Pico Resources, Tutorials, Examples and Videos see the main Raspberry Pi Pico page.
Additional Resources
Below you will find more interesting and relevant resources
IoT
Internet of Things
Raspberry Pi
Raspberry Pi resouces