1 Introduction
In this Tutorial we will use Raspberry Pi Pico W (Raspberry Pi Pico with WiFi). We will write Data to a Cloud Service called ThingSpeak. ThingSpeak is owned by MathWorks, the same vendor that develop the MATLAB software. We will use the built-in Temperature Sensor on the Pico hardware as an example when Writing Data to ThingSpeak (but you can use any type of sensor).
Raspberry Pi Pico W and ThingSpeak Cloud Service (YouTube) + PowerPoint (PDF)
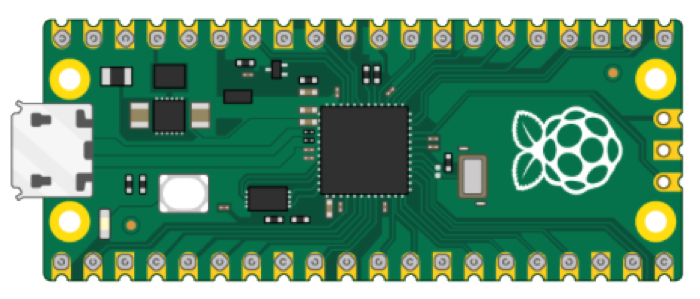
1.1 Raspberry Pi Pico
Raspberry Pi Pico is a “downscaled” version of the original Raspberry Pi and is more comparable with Arduino compared to the original Raspberry Pi. You also need to use a downscaled version of Python, called MicroPython.
Haven't used Raspberry Pi Pico before? Getting Started with Raspberry Pi Pico
Raspberry Pi Pico W has built-in WiFi while ordinary Raspberry Pi has no WiFi. Since we are going to send data over Internet we need Raspberry Pi Pico W and WiFi in this tutorial.
1.2 Python
As mentioned, Raspberry Pi Pico uses a downscaled version of Python, called MicroPython, but most of the original Python will work.
Here you will find more Python Resources.
2 ThingSpeak
ThingSpeak is an IoT service that lets you collect and store sensor data in the cloud and develop Internet of Things applications. ThingSpeak is free for small non-commercial projects. In addition, they offer different types of licenses where you pay a monthly fee. ThingSpeak is owned by MathWorks, the same vendor that develop the MATLAB software.
ThingSpeak website: https://thingspeak.com
ThingSpeak has a HTTP REST API we can use in order to write/send data to ThingSpeak.
The server address to the REST API is: https://api.thingspeak.com.
Here you see a basic example which you can test in your Web Browser (just copy it into the URL field in your web browser, replace xxxxxx and hit enter):
https://api.thingspeak.com/update?api_key=xxxxxx&field1=20ThingSpeak is structured into channels and each channel has up to 8 data fields. The API Keys are used to make sure you write to the correct channel and for security reasons, so make sure not to share the API Keys with others.
3. Built-in Temperature Sensor
The raspberry Pi Pico has a built-in Temperature Sensor. The Temperature Sensor is inside the RP2040 microcontroller chip which is located on the Raspberry Pi Pico. It can be used for simple application and for test and demo purposes.
Basic Code Example that reads the Temperature value from the built-in Temperature Sensor:
import machine
import time

adcpin = 4
sensor = machine.ADC(adcpin)

 def ReadTemperature():
 	adc_value = sensor.read_u16()
 	volt = (3.3/65535) * adc_value
 	temperature = 27 - (volt - 0.706)/0.001721
 	return round(temperature, 1)

 while True:
 	temperature = ReadTemperature()
 	print(temperature)
 	time.sleep(5)
You find more information about this sensor in the Datasheet (Chapter 4.9.5. Temperature Sensor)
https://datasheets.raspberrypi.com/rp2040/rp2040-datasheet.pdf
The Temperature Sensor is located inside the RP2040 microcontroller on the Raspberry Pi Pico board, so the values from the sensor will typcally be higher than the room temperature.
You may also want to structure the code into a Class and a separate Python module to make it easier to reuse the code in different applications. The code is shown below.
Temperature Sensor Module (Filename: PicoSensor.py):
from machine import ADC

class Temperature:
    def __init__(self):
        adcpin = 4
        self.sensor = ADC(adcpin)

    def ReadTemperature(self):
        adc_value = self.sensor.read_u16()
        volt = (3.3/65535)*adc_value
        temperature = 27 - (volt - 0.706)/0.001721
        return round(temperature, 1)
More information/resources regarding Functions, Classes and Modules in Python:
Create Functions with Python (YouTube) + PowerPoint (PDF)
Create Classes in Python (YouTube) + PowerPoint (PDF)
Main Program:
from PicoSensor import Temperature
import time

sensor = Temperature()

while True:
    temperature = sensor.ReadTemperature()
    print(temperature)
    time.sleep(5)
We will use this as an example later when writing data to ThingSpeak.
More information/resources regarding the onboard Temperature Sensor on Raspberry Pi Pico:
Raspberry Pi Pico and onboard Temperature Sensor
4 Connect Raspberry Pico W to WiFi
In order to connect to network and WiFi and use network communication on Raspberry Pi Pico you need to use the MicroPython network Module.
Basic Code Example for connection Raspberry Pi Pico to WiFi:
import network
from time import sleep

ssid = 'xxxxxx'
password = 'xxxxxx'

def ConnectWiFi():
    wlan = network.WLAN(network.STA_IF)
    wlan.active(True)
    wlan.connect(ssid, password)
    while wlan.isconnected() == False:
        print('Waiting for connection...')
        sleep(1)
    print(wlan.ifconfig())

ConnectWiFi()
5 Write to ThingSpeak
Each Channel in ThingSpeak has up to 8 data fields, location fields, and a status field.
Note! A Free ThingSpeak Channel can only be updated every 15 seconds.
We will use the ThingSpeak REST API and HTTP. In order to use HTTP with Raspberry Pi Pico W we can use the urequests MicroPython Module. It is included with the MicroPython firmware that you already has installed on your Raspberry Pi Pico (so no extra download/installation is necessary). The urequests module allows you to send HTTP requests using MicroPython. The urequests module is a downscaled version of the requests module that exists for ordinary Python.
Basic ThingSpeak Write Example:
import network
import urequests
import random
from time import sleep

#Network Initialization
ssid = "xxxxxx"
password = "xxxxxx"

def ConnectWiFi():
    wlan = network.WLAN(network.STA_IF)
    wlan.active(True)
    wlan.connect(ssid, password)
    while wlan.isconnected() == False:
        print('Waiting for connection...')
        sleep(1)
    ip = wlan.ifconfig()[0]
    print(f'Connected on {ip}')
    return ip

#Connect to Network
ip = ConnectWiFi()

#ThingSpeak Initialization
server = "http://api.thingspeak.com/"
apikey = "xxxxxx"
field = 1

#Main Program
while True:
	temperature = random.uniform(20, 25) #Random Number between 20 and 25
	temperature = round(temperature, 1)
	print(f"T = {temperature}°C")


	url = f"{server}/update?api_key={apikey}&field{field}={temperature}"
	request = urequests.post(url)
	request.close()

    sleep(20)
Final Application
Now we know how to connect to a WiFi network and write a value to ThingSpeak, lets create our final application.
We make separate Python Modules for Network part and for ThingSpeak part. We also put Usernames, Passwords, etc. into separate Configuration Files. Basically, most of the Code (that are general and can be reused) are put into separate Python libraries to improve the code structure and code quality and make it easier to reuse the code for different applications.
We have now made 3 Python modules tjhat we will use in our application:
- Temperature Sensor Module
- WiFi Module
- ThingSpeak Module
WiFi Module (Filename: WiFiNetwork.py):
import network
import wificonfig
from time import sleep

class WiFi:
    def __init__(self):
        self.ssid = wificonfig.ssid
        self.password = wificonfig.password

    def ConnectWiFi(self):
        wlan = network.WLAN(network.STA_IF)
        wlan.active(True)
        wlan.connect(self.ssid, self.password)
        while wlan.isconnected() == False:
            print('Waiting for connection...')
            sleep(1)
        ip = wlan.ifconfig()[0]
        print(f'Pico Connected on IP {ip}')
        return ip
Your WiFi network credentials should be put into a seperate Python file for security reasons. WiFi network credentials include a WiFi network name (SSID) and a password.
WiFi network credentials (Filename: wificonfig.py):
ssid = "xxxxxx"
password = "xxxxxx"
ThingSpeak Module (Filename: ThingSpeak.py):
import urequests
import thingspeakconfig

class ThingSpeakApi:
    def __init__(self, field):
        self.server = thingspeakconfig.server
        self.apikey = thingspeakconfig.apikey
        self.field = field

    def WriteData(self, fieldvalue):
        url = f"{self.server}/update?api_key={self.apikey}&field{self.field}={fieldvalue}"
        request = urequests.post(url)
        request.close()
Your ThingSpeak credentials are put into a seperate Python file for security reasons.
ThingSpeak credentials (Filename: thingspeakconfig.py):
server = "http://api.thingspeak.com/"
apikey = "xxxxxx"
When we have created the different classes and Python modules, we can create our main application:
Main Program:
from PicoSensor import Temperature
from WiFiNetwork import WiFi
from ThingSpeak import ThingSpeakApi
from time import sleep

#Sensor Initialization
sensor = Temperature()

#ThingSpeak Initialization
field = 1
thingspeak = ThingSpeakApi(field)

#Network Initialization
network = WiFi()
ip = network.ConnectWiFi()

#Main Program
while True:
    temperature = sensor.ReadTemperature()
    print(f"T={temperature}°C")
    thingspeak.WriteData(temperature)
    sleep(20)
We get the following results in ThingSpeak:

6 Write Multiple Fields to ThingSpeak
In a ThingSpeak Channel we can use up to 8 Fields (field1, field2, ..., field8).
This is an example of the ThingSpeak API for writing data to multiple fields:
https://api.thingspeak.com/update?api_key=XXXXXX&field1=21&field2=24
Let's update/modify the code so it is possible to write data to multiple Fields in a Channel as well. Lets start by updating the ThingSpeak.py Python module:
ThingSpeak Module (Filename: ThingSpeak.py):
import urequests
import thingspeakconfig

class ThingSpeakApi:
    def __init__(self):
        self.server = thingspeakconfig.server
        self.apikey = thingspeakconfig.apikey

    def WriteSingleField(self, fieldvalue):
        url = f"{self.server}/update?api_key={self.apikey}&field1={fieldvalue}"
        request = urequests.post(url)
        request.close()

    def WriteMultipleFields(self, field_data):
        url = f"{self.server}/update?api_key={self.apikey}"
        i = 1
        for field_value in field_data:
            url = url + f"&field{i}={field_value}"
            i = i + 1

        request = urequests.post(url)
        request.close()
As you see there are now 2 methods WriteSingleField() and WriteMultipleFields() which you can use depending if you only want to write a value to a single field or to multiple fields (e.g., if you have multiple sensors).
Main Program:
from PicoSensor import Temperature
from WiFiNetwork import WiFi
from ThingSpeak import ThingSpeakApi
from time import sleep
#Sensor Initialization
sensor = Temperature()
#ThingSpeak Initialization
thingspeak = ThingSpeakApi()
#Network Initialization
network = WiFi()
ip = network.ConnectWiFi()
#Main Program
while True:
temperature = sensor.ReadTemperature()
print(f"T = {temperature}°C")
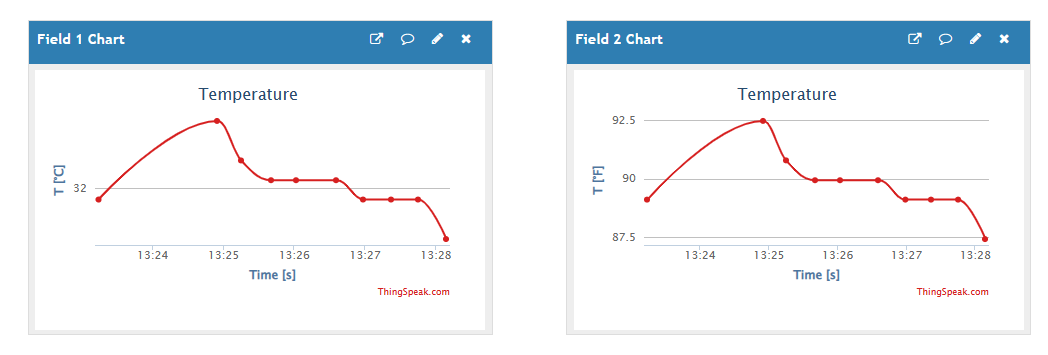
temperatureF = round((temperature*1.8) + 32, 2)
field_data = (temperature, temperatureF)
thingspeak.WriteMultipleFields(field_data)
sleep(20)
We get the following results in ThingSpeak:
Raspberry Pi Pico W and ThingSpeak Cloud Service (YouTube) + PowerPoint (PDF)

For more Raspberry Pi Pico Resources, Tutorials, Examples and Videos see the main Raspberry Pi Pico page.
Additional Resources
Below you will find more interesting and relevant resources
IoT
Internet of Things
Raspberry Pi
Raspberry Pi resouces