1 Introduction
In this Tutorial we will use a Raspberry Pi Pico and I2C Communication. We will exemplify using a TC74 Temperature Sensor with I2C Interface. We will use the Thonny Python Editor and MicroPython.
Raspberry Pi Pico and I2C - Exemplified using a TC74 Temperature Sensor (YouTube) + PowerPoint (PDF)
What do you need?
- Raspberry Pi Pico
- A Micro-USB cable
- A PC with Thonny Python Editor (or another Python Editor)
- Breadboard
- Electronics Components like LED, Resistors, Jumper wires, etc.
- TC74 Temperature Sensor with I2C Interface
TC74 Temperature Sensor is a cheap and versatile sensor with I2C Interface. You can buy it many places like Elfa Distrelec, RS Online, Digi-Key, Adafruit, etc.
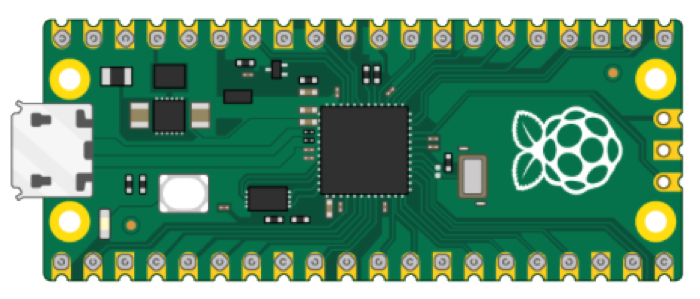
1.1 Raspberry Pi Pico
Raspberry Pi Pico is a “downscaled” version of the original Raspberry Pi and is more comparable with Arduino compared to the original Raspberry Pi. You also need to use a downscaled version of Python, called MicroPython.
Haven't used Raspberry Pi Pico before? Getting Started with Raspberry Pi Pico
1.2 Python
As mentioned, Raspberry Pi Pico uses a downscaled version of Python, called MicroPython, but most of the original Python will work.
Here you will find more Python Resources.
2 I2C Communication
Most Microcontrollers (including the Raspberry Pi Pico) and small IoT devices support the I2C protocol.
With the I2C protocol you can communicate using just two wires, a clock and data line (+ Power and GND) Typically you use I2C to talk to devices like sensors, small displays, PWM or motor drivers, and other devices. The Sensor you want to communicate with needs to support the I2C protocol. There exist thousands of different Sensors, etc. that support the I2C Protocol.
I2C Resources:
I2C Communication Protocol and How It Works - Seeedstudio
2.1 I2C with Raspberry Pi Pico
Raspberry Pi Pico has two I2C controllers. You can access these I2C controllers through most of the GPIO pins of Raspberry Pi Pico. So, you should configure in software (your MicroPython program) which GPIO pins you want to use with a specific I2C controller.
Here you see the Raspberry Pi Pico Pinout.
In order to start using I2C in your MicroPython program for the Raspberry Pi Pico you need to:
from machine import I2C
Initialize I2C Communication:
i2c = I2C(i2c_interface, scl=sclpin, sda=sdapin, freq=100000)
Read Data from the connected I2C device:
data = i2c.readfrom(address, n, True)
where you read n bytes from the device.
Many other I2C functions do exist, see documentation: https://docs.micropython.org/en/latest/library/machine.I2C.html
You can scan for connected I2C devices:
from machine import Pin, I2C

i2c_interface = 0

sdapin = Pin(16)
sclpin = Pin(17)

i2c = I2C(i2c_interface, scl=sclpin, sda=sdapin, freq=100000)

i2cdevices = i2c.scan()

print(i2cdevices)
3 TC74 Temperature Sensor with I2C Interface
The TC74 Temperature Sensor from Microchip is a cheap (about $2) and versatile sensor with I2C Interface. It is also breadboard friendly. It is also easy to use. The accuracy is ±2°C.
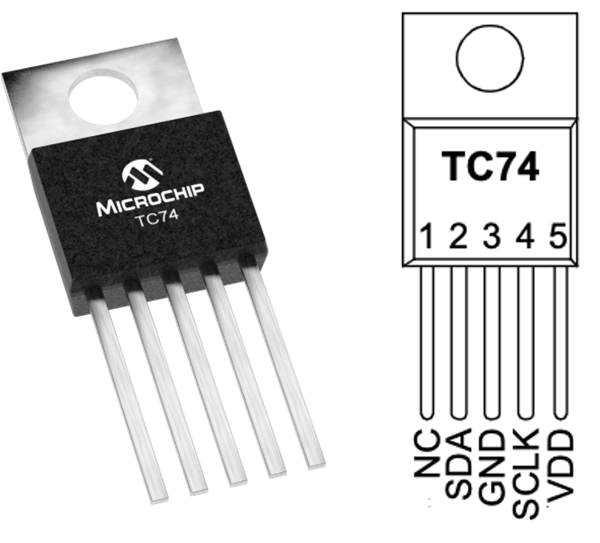
The TC74 has 5 pins where one of them is not used:
- NC - Not in use (Not Connected)
- SDA - Serial Data – Bidirectional
- GND – Ground
- SCLK/SCL - Serial Clock Input
- VDD – Power Supply Input (+3.3v)
The TC74 acquires and converts temperature information from its onboard solid-state sensor. It stores the data in an internal register which is then read through the serial port. The system interface is a slave SMBus/I2C port, through which temperature data can be read at any time. Device Address: 0x48
Here is how you connect the TC74 to your Raspberry Pi Pico:
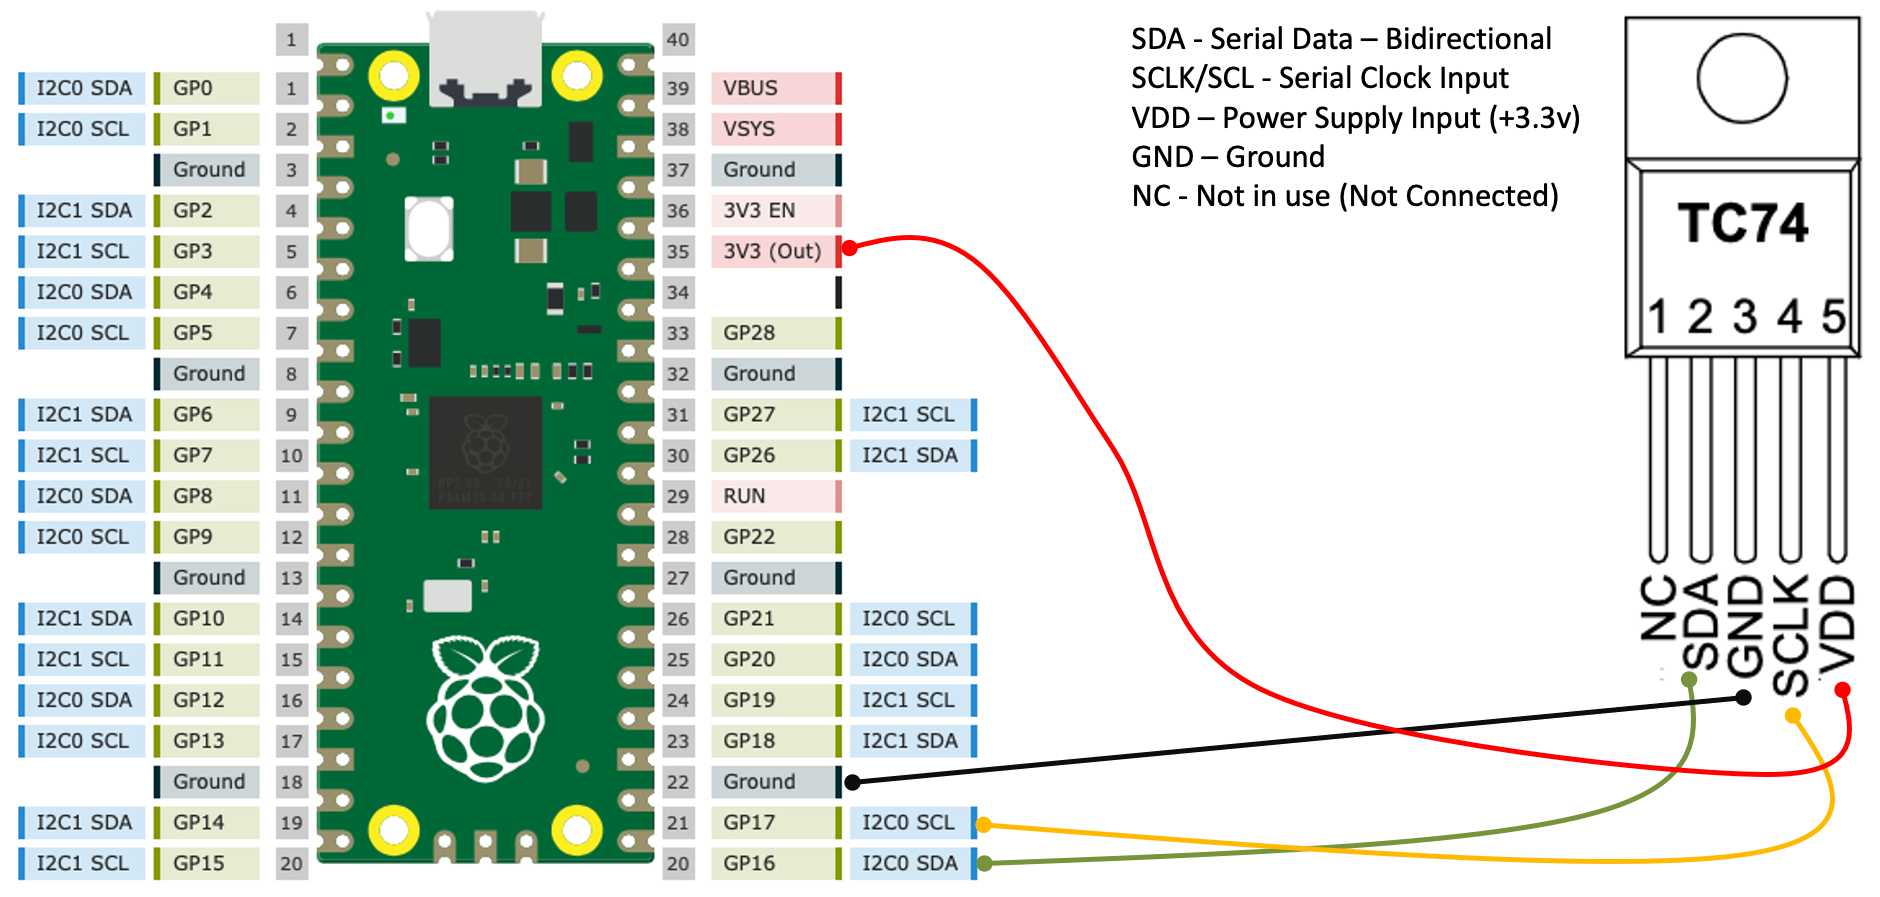
This is just an example, you could have used other pins as well.
4 MicroPython Code Examples
Basic Code Example
Basic Example reading a Temperature Value from the TC74 Temperature Sensor:
from machine import Pin, I2C

i2c_interface = 0
sdapin = Pin(16)
sclpin = Pin(17)

i2c = I2C(i2c_interface, scl=sclpin, sda=sdapin, freq=100000)

tc74address = 0x48
data = i2c.readfrom(tc74address, 1, True)
print(data)  # Data received is a byte object

# Converting to int. Resolution for TC74 Sensor is 1°C
# byteorder is big where MSB is at start
temp = int.from_bytes(data, "big")
print(temp)
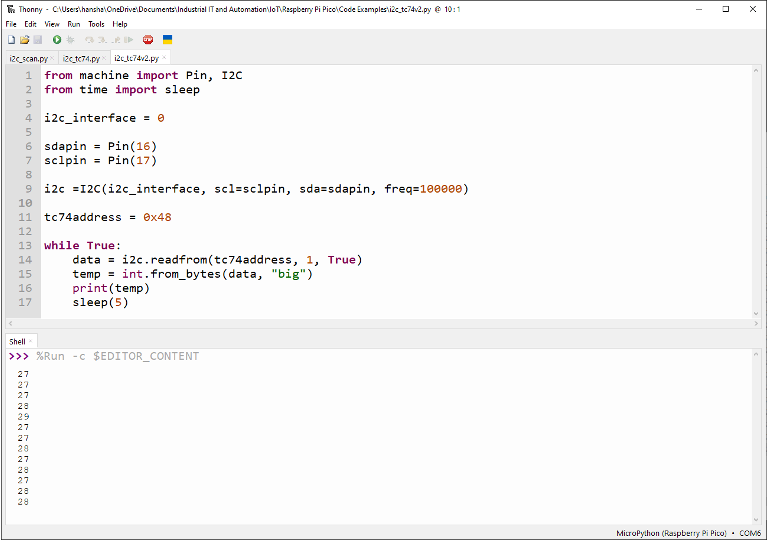
While Loop
Typically we want to read data continuously using a While loop:
from machine import Pin, I2C
from time import sleep

i2c_interface = 0

sdapin = Pin(16)
sclpin = Pin(17)

i2c = I2C(i2c_interface, scl=sclpin, sda=sdapin, freq=100000)

tc74address = 0x48

while True:
    data = i2c.readfrom(tc74address, 1, True)
    temp = int.from_bytes(data, "big")
    print(temp)
    sleep(5)
Here you see the code and the results in the Thonny Editor:
Final Application
Let's make a separate Python Module with a Class and a Function that handles all the logic regarding reading Temperature Data from the TC74 Temperature Sensor
Python Module (Sensor.py):
from machine import Pin, I2C

class TC74:
    def __init__(self, interface, sda, scl):
        sdapin = Pin(sda)
        sclpin = Pin(scl)
        self.i2c = I2C(interface, scl=sclpin, sda=sdapin, freq=100000)

    def ReadTemperature(self):
        tc74address = 0x48
        data = self.i2c.readfrom(tc74address, 1, True)
        temp = int.from_bytes(data, "big")
        return temp
More information/resources regarding Functions, Classes and Modules in Python:
Create Functions with Python (YouTube) + PowerPoint (PDF)
Create Classes in Python (YouTube) + PowerPoint (PDF)
Main Application (main.py):
from Sensor import TC74
from time import sleep

# Initialization
i2c_interface = 0
sdapin = 16; sclpin = 17
sensor = TC74(i2c_interface, sdapin, sclpin)

while True:
    temp = sensor.ReadTemperature()
    print(temp, "°C")
    sleep(5)
If you want to run your Raspberry Pi Pico without it being attached to a computer, you can use an external USB Micro Power Supply (between 1.8V and 5.5V). To automatically run a MicroPython program, simply save it to the device with the name main.py. Save the main.py file on the Raspberry Pi. Unplug the connection to your PC, then attach the USB Micro Power Supply. Then the main.py should automatically run when the Pico is starting.
You can also click Ctrl + D in the Shell inside the Thonny Editor to force a soft reboot command. In both cases the "main.py" program should start to run automatically.

For more Raspberry Pi Pico Resources, Tutorials, Examples and Videos see the main Raspberry Pi Pico page.
Additional Resources
Below you will find more interesting and relevant resources
IoT
Internet of Things
Raspberry Pi
Raspberry Pi resouces